This post contains affiliate links. That means I may earn a small comision if you click on a link and purchase something. This cost you nothing. Read all the legal boring stuff here..
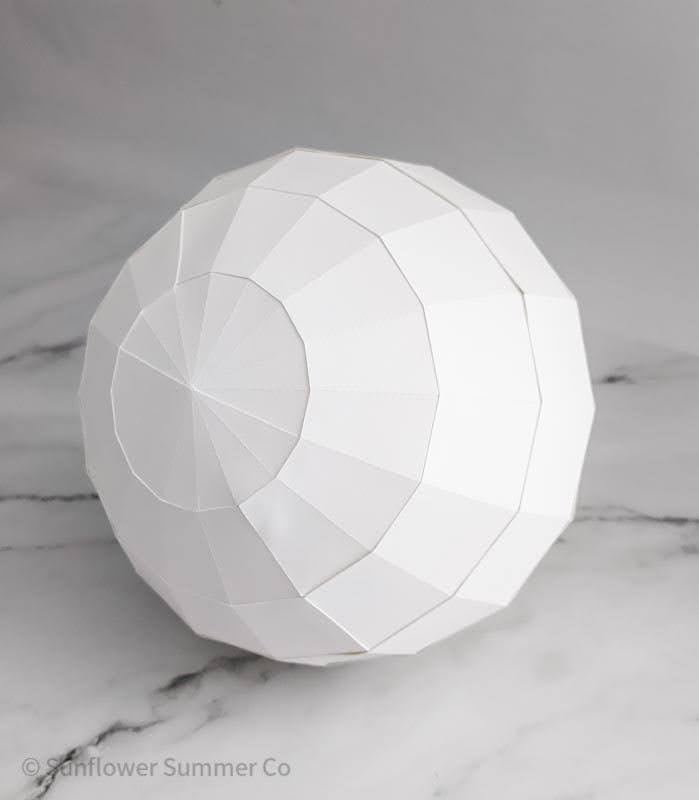
Making a sphere out of paper can be difficult if you don’t know where to begin.
This easy, step-by-step guide will show you how to make a hollow paper sphere quickly and easily.
Making 3d objects out of paper is super fun and addictive because you don’t need any special tools.
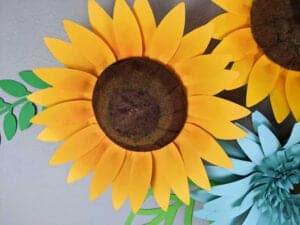
This simple paper sphere would make an awesome decoration with its geometric shapes. I haven’t tried it but I think it would also make a great way to give money as a present.
This paper sphere can also be made without a balloon so you don’t need to run to the store and get one.
The template comes with 2 different-sized spheres. 4″ and 6″ so you can choose what size you need.
Materials:
Sharp scissors, Cricut, or Silhouette
2-3 pieces of paper (cardstock will hold it’s shape the best)
Optional:
Paintbrush
Buy the SVG and PDF template so you can make this awesome paper sphere.
Step one: Cut out the template
Cut out the template along the solid lines if you use scissors.
If you are using a
Step two: Line up the pieces
Lining up the pieces beforehand will make creating this paper sphere much faster and easier.
Line them up in this order.
You will be putting the sphere together from left to right.
Step 3: Fold and glue the strips of paper
If you used a cutting machine, fold along the score lines.
If you were hand cutting, use a straight edge to fold along the dashed lines.
Every fold will be a mountain fold.
Glue the first two pieces together to form a sun shape. This will be your south pole.
I like to use a small paint brush to apply the glue so there isn’t a ton of extra glue squeezing out. It is also easier to be more precise when you apply it.
This is what your first piece will look like.
Add the second row
Line up the folds of the new piece with the folds of the sun shape. Try to line them up as well as you can so your paper sphere will not look deformed later.
Glue down the flaps connecting the two pieces of the row.
Now add glue to the tabs that hold the ends of the strips together. Be sure to glue the edge of the paper right on the fold of the flap. You want to be as close as you can to the fold so the next pieces fit well.
Keep adding on the rows until you reach the top
Repeat adding the rows to the paper sphere. Row by row you will see it start to take shape.
Row 5 will start angling back in
Once you get to row 5, the sphere will start to take shape. If you are finding that you can’t get your fingers into the paper sphere to hold down the glued tabs, use the end of a paintbrush to push them down.
You will be finishing at the north pole
The last piece will be a bit different than the others since it is the top of the paper sphere. You will glue the final two pieces together before adding them to the north pole of the sphere.
This is what the piece will look like before you glue it on.
Add glue to the last tabs and add the final piece.
To make sure that the tabs come in contact with the last piece of the paper sphere, I will fold them in towards the top of the circle but then I will fold them back out with a valley fold.
This makes it so the tabs will be pushing against the north pole piece when it is placed.
Let your sphere dry and you are good to go.
Create this paper sphere! It’s easy and really fun.
Be patient when cutting the strips – it takes a little time but the final product is worth it if you are precise with your cuts.
And if your spheres aren’t perfect, don’t worry – that just makes them all the more unique.
So go ahead and try making this awesome paper sphere – we promise you won’t be disappointed!
You might also like: