
This post contains affiliate links. That means I may earn a small comision if you click on a link and purchase something. This cost you nothing. Read all the legal boring stuff here..
Cricut User: Cricut design space will resize this template because it is “too big” to cut. You will need to resize this file to 32.492 wide. You can find a tutorial for this here. Also,
This paper peony tutorial took forever to publish!
While I was making preparing this tutorial, my 9 month old daughter pulled the tablecloth off the table.
Pulling the tablecloth off the table isn’t terrible. But guess what was on the table… my laptop. Down, down, down it went. Falling to its untimely demise.
Luckily, it wasn’t that bad. The WiFi and some USB ports broke. I could also still use it. But I couldn’t do the things needed to post to my website because I couldn’t connect to the internet. So this paper peony tutorial was put on hold.
It was a good thing that we bought insurance for my laptop. *sigh with relief.* I had a feeling that I would need it. Especially when I have 2 kids under the age of 3.
It took two weeks to get my computer repaired. So I had two weeks with my old, insanely slow laptop. First world problem right there.
That is why it took so long to get this one posted!
Warning to all of you with laptops and kids. Don’t leave your computer on the table with kids around! Especially when you have a tablecloth.
I sure learned my lesson.
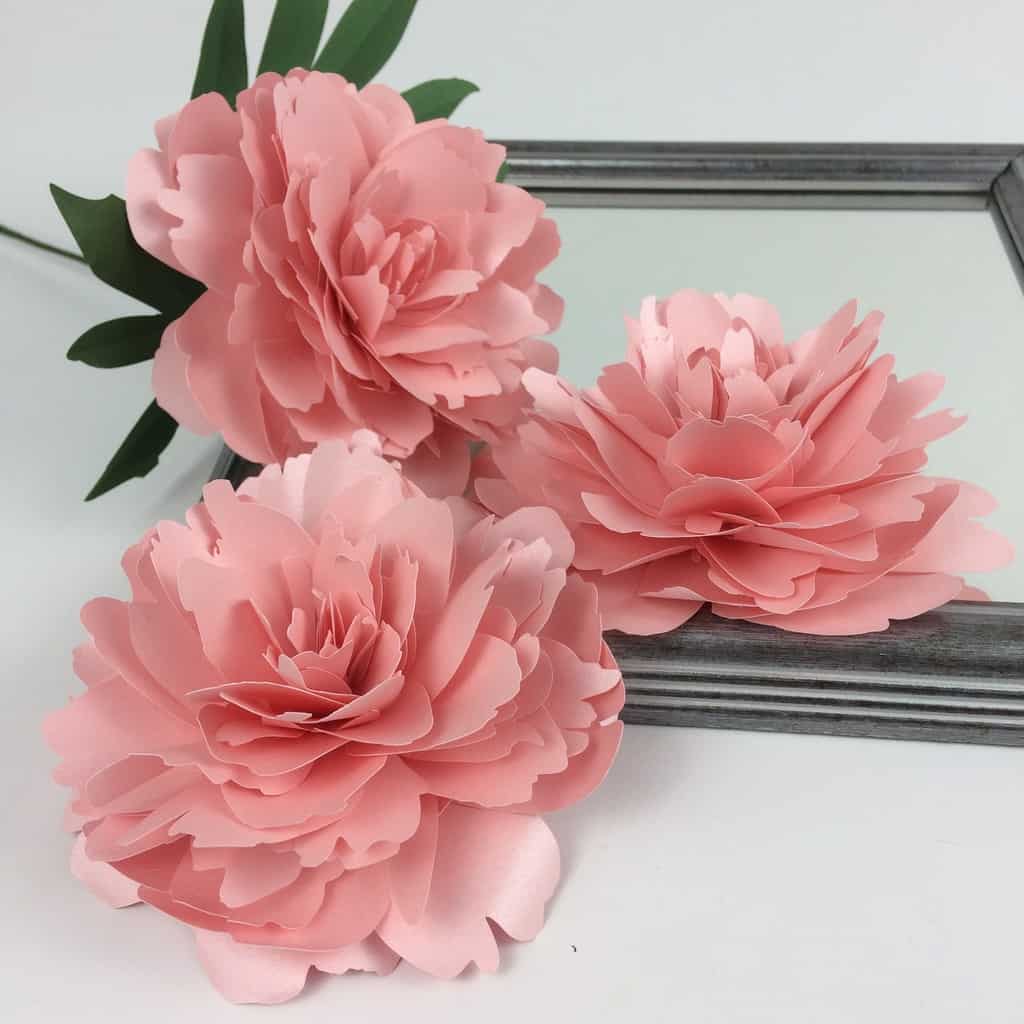
I created this flower by tracing the petals of a real peony. So every petal is different! This is the second flower I have created from an actual flower. The first was a rose. Check out how to make a paper rose.
Materials
- Silhouette, Cricut, or Scissors
- 18 gauge green paper covered floral wire
- Metallic text-weight paper
- I use the colors rose quartz and botanic
- You can use card-stock instead of metallic paper (get paper here)
- Hot glue gun
- Floral Tape
- Wire cutters
- Flower Shaping Mat and Shaping tools
The links will bring you to Amazon, Cards and Pockets, and
Step 1:
Curl petals 1-4 down with a pair of scissors.
Step 2
Curl 5-6 randomly with scissors. So curl some petals up and some down.
Step 3
Curl 7-8 up with scissors
Step 4
Curl 9-24 randomly around a paint brush
Step 5
For the center piece, curl the petals back and forth.
Step 6
Roll up the center and glue it.
Step 7
Give the petals some shape by using a shaping mat and a ball tool. press down to make the petals stand up.
Step 8
Glue the petals together in order. Once you get closer to the center, use a paintbrush to push the petals into place.
Step 9:
Glue the rolled up center piece into the middle.
Step 10
Use scissors and a shaping mat to give a crease down the center of the leaves.
Step 11
Use the ball tool to give the leaves some curl at the edges.
Step 12
Cut some lengths of wire and glue them onto the base of the leaves.
Step 13
Wrap some floral tape around the wire and the base of the leaf.
Step 14
Form a circle at the top of a long piece of floral wire.
Step 15
Glue the flower onto the stem.
Step 16
Using floral tape, tape the leaves on under the flower. Tape them on from smallest to biggest.


Hi Becca-Your flowers are beautiful.I just downloaded the PEONY. I use Cricut Design Space and so it did not download to the correct size. I enlarged the download to 32.429.The flowers changed to the correct size but the
numbers do not align with the flowers. If you could give me a clue as to what I might be doing wrong, I would greatly appreciate it. Again thank you for the download. Leslie
When I saved the file the first time, the latest version a Silhouette Studio had a glitch where it wasn’t saving the compound path and that caused the numbers to not align with the petals. I thought I had all the files fixed. I guess not. Thanks for letting me know.
I didnt get the template yet
I sent you your template
Thank you for your template . I loved the tutorial you make it look so easy I hope to make it soon
Take care and have a blessed day.
I’m glad you love the template! I hope you enjoy making it.
Love the simple lines of the flower never had much success making flowers that look good
I haven’t received the template for the peony yet, I can’t wait to make it with Mother’s Day quickly approaching. Thanking you in advance.
Lovely template, very pretty and realistic result. Thank you very much :)
I’m using the cricut maker and the sizing does not come out correctly as the others have stated above. Any suggestions
I have included the size that you need to resize the file to in the tutorial. I don’t have it in the video, it is in the written part of the tutorial
Becca, I’ve just put my first peony together and it is stunning! Thank you so much for the template, it’s the most realistic paper flower ever! I love that every petal layer is different. I made mine in 160gsm cardstock in a salmon colour, but I definitely want to try them in pearl paper next, I want a vase full of them, everlasting peonies!
I’m glad you liked them!