This post contains affiliate links. That means I may earn a small comision if you click on a link and purchase something. This cost you nothing. Read all the legal boring stuff here..
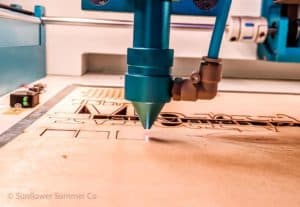
You need to cut a large piece of material, but your Thunder Laser’s bed isn’t big enough for the awesome project you have in mind.
The pass-through slot on the Thunder Laser allows you to easily cut materials much larger than the machine’s bed. This feature is incredibly easy to use and creates amazing results.
To use the pass-through slot you will need to learn to use the print and cut feature in LightBurn.
By doing this, you can easily cut designs and patterns that are as long as the longest piece of wood you can find.
Step 1: Upload the design to lightburn
You can either drag and drop your design from your file explorer or you can use the little folder icon to open your design.
Step 2: Prep the design for cutting larger than your cutting bed
Cutting the shape
Create a rectangle about .5″ or smaller than your cut bed. This makes it much easier to line up the shapes later.
You will place this rectangle over the shape. The rectangle you created will be your cutting shape and will disappear once you cut the design. So if you need to cut the design more than once, make sure to have a copy of it.
Select the shapes you want to cut and your cutting box then go to Tools>Cut Shapes.
This will cut your shapes into the size that will fit on your bed.
Pro Tip: If you click and drag to the right when selecting, you will only select the shapes that are completely in the selection box. If you click and drag to the left, you will select all the shapes that are touching the selection box.
Create Target Points
Draw one line with the line tool. Copy the line so you have two of them.
Rotate one line while holding down the shift so the line is perpendicular.
Select both lines and then use the “align V-Center” and “Align H-Center” to make a cross hair. Group the shapes with Ctrl-G or right-click and press group.
This is what you will end up with.
Add the target points to your design
You will need two target points for your design so copy and paste the crosshair shape.
There are two ways to use the crosshairs. You can either score them into the material when you are cutting or you can line them up with an obvious spot on the design.
Here I lined them up with the corners of the R.
Because it is a corner, I can easily line up the laser head with this spot after it is cut without needing to score the crosshairs into the material.
You want your crosshairs close to the bottom of the design because when you slide the material through, you will leave these crosshairs on the cutting bed to line it up later.
If you are lining up with a corner of the cut design, set the crosshairs to a different color and set them to no output to prevent them from being cut.
But if you are cutting something with lots of curves and no obvious points to line up with later. Move the crosshairs off your design and set them to score.
Step 3: Open the pass-through doors
To open the pass-through doors, unlock the top panel and remove it.
If you have never opened yours, some bolts might hold it in place on the top inside of the machine. I have removed mine but this is where it is located.
On the back of the machine, unscrew the panel and remove it.
Step 4: Load in your material
Load in your material so it is ready to go.
Because the material is longer, sometimes it helps to prop it up with something to make sure it will not get moved during the cutting.
Step 5: Set your origin
For the first cut, I use “start from user origin” and place the laser head in the top right corner of the material.
Press origin on the Thunder Laser after you place the head in the top right corner. This is where the laser will start its cut.
You also want to have “cut selected graphics” and “use selection origin” enabled.
This means only the materials you have selected are going to be cut out and the origin is connected to your selection not all the shapes on your screen.
Job origin shows where the laser will start. Because you want the laser to start in the top left corner, be sure you have the top-left dot highlighted. If you want it to start in the top right, make sure it is the top right highlighted.
You can see where the job origin is by the little green dot.
Step 6: Select the first part of the design and cut
Select the first part of the design and cut it out.
Don’t forget to frame your design. Measure twice cut once!
Step 7: Slide the material through
When the first part of the design is cut, side the material through the Thunder Laser and make sure your target points are on the cut bed.
Be sure you didn’t leave any of the small pieces you just cut under the material.
Step 8: Move the head and set the origins
Now comes the hardest part.
We are going to use the print and cut feature to line up the next cut.
(I am not actually cutting larger than my bed because it creates more smells but it is the same process.)
Set first target position
Move the laser head above the first target point. Center it the best you can.
If you are using a corner of a cut instead of the crosshairs, line it up with the corner.
Changing the speed of the laser head can really help get it lined up perfectly.
On your laser, press speed and change it to around 5mm/s.
Each digit rotates from 0-9. So if your speed is 105mm/s, you will only need to go to the hundred’s place and arrow down once to get to 5mm/s. Press “enter” when you have the speed you want.
Be sure to change it back when you are done because this is the speed the laser will move when framing.
When your laser is positioned above the crosshairs, select the same crosshairs on the computer.
While it is selected, go to Laser Tools> Print and Cut> Set first target position.
Now the crosshairs will be circled in red.
Set Second target Position
Line up the laser head with the second crosshairs.
Select the second crosshairs then go to Laser Tools> Print and Cut> Set second target position.
Align to Target
Now that both the origins are set, go to Laser Tools> Print and Cut>Align Outputs to targets.
Your crosshairs will now be circled in green too. So even if you put the material in crooked, your next cut will still line up with the previous one.
Step 9: Frame your cut
Make sure you are using Absolute Coords or this next part will not work.
Now select the second half of your design to be cut.
With the second part selected, use the frame with a circle to frame your design. Make sure that the ends of the new cuts line up with your previous cuts.
Another pro tip is to use the preview button to look at your design before cutting it out to ensure it will cut properly.
Step 10: Cut it out and repeat if necessary
Keep repeating this process until the whole project is cut out.
So what are you waiting for? Go start creating!
With the easy-to-use passthrough slot on your Thunder Laser, there’s no excuse not to turn your largest projects into a reality.
And if you need some help getting started, be sure to sign up for my email list for updates on new Thunder Laser Tutorials and to up your laser cutting game.
Sign Up Below