This post contains affiliate links. That means I may earn a small comision if you click on a link and purchase something. This cost you nothing. Read all the legal boring stuff here..
Buying a 3D printer is exciting, but it can be hard to know what to expect.
We all know that owning a laser printer will change your life, but there’s no way around the fact that you’re going to have some questions before you
The good news is that I’ve been through this process already and am here to help with this Glowforge review. This post answers many of the common questions people ask about buying their own laser cutter/engraver so they can make great gifts for friends and family or start selling their creations online.
And, I’m sure you wanted a Glowforge laser cutter as soon as you saw the commercial. I sure did. I thought it was amazing the things they created and I’m sure you are just as amazed because you’re looking at purchasing one of your own.
If you haven’t seen the commercial, check it out:
A Glowforge is a great investment. You can easily start your own business or create things you never thought you would be able to.
You can create a laptop stand, toys for your kids, and or things to decorate your home.
But is a Glowforge worth the price tag? Keep reading this Glowforge review to find out.
There are many great things about Glowforge but there are some things that you should know before you
The Box is Huge!
The box that the Glowforge comes in is huge. You see pictures but you don’t realize how big it is until you have the box sitting in front of you.
And you’ll need to keep the box just in case you need to send the Glowforge in for repairs. So be sure you have a place to store a box 3 of your kids could fit in.
Here is my Glowforge box in the crawlspace. That is a small Uhaul box to the left and a tv box on top of it.
Set up-
Set up was super easy. The hardest part was figuring out how to open the box. I had to get my husband to open it for me.
The instructions on how to open the box are found on a webpage and you get the URL from inside the box. I thought that was a little bit funny.
But once you have your Glowforge in place, it is a matter of following the instructions provided. I was able to set mine up in about 10 minutes.
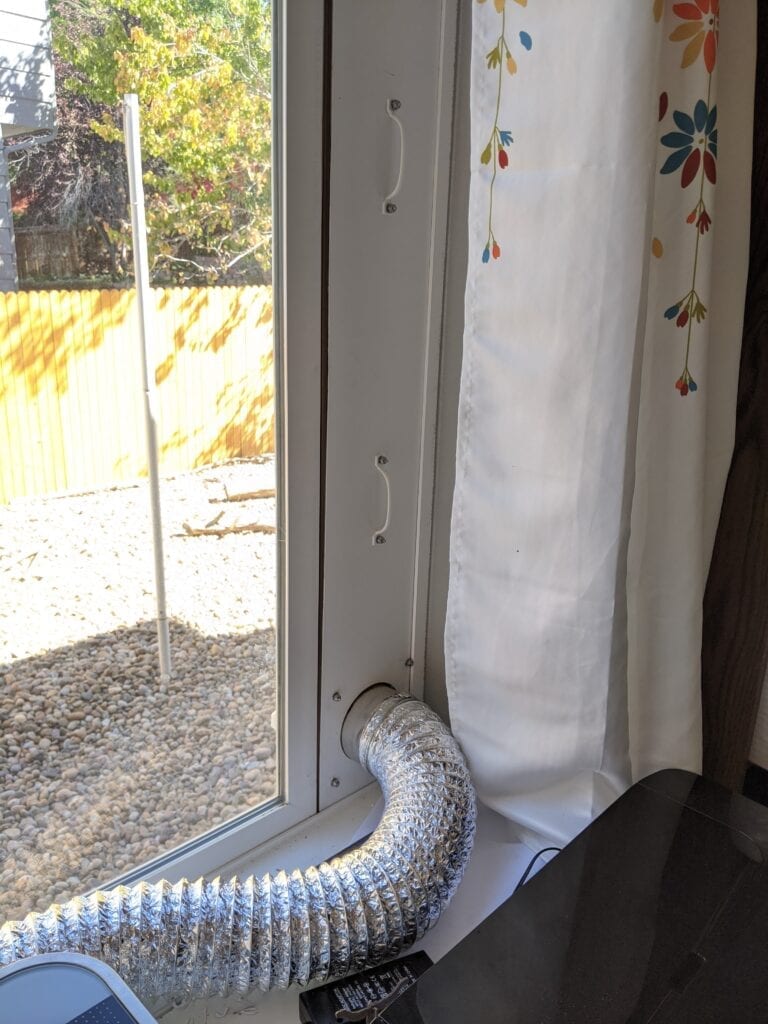
You’ll need to place your Glowforge next to a window unless you want to cut a hole in your house for a dryer vent exhaust. You have to exhaust your Glowforge outside or else you will have smoke filling up your room.
There is an option to
The Glowforge air filter runs at $1295. I personally will not pay for it unless I felt I need one.
People
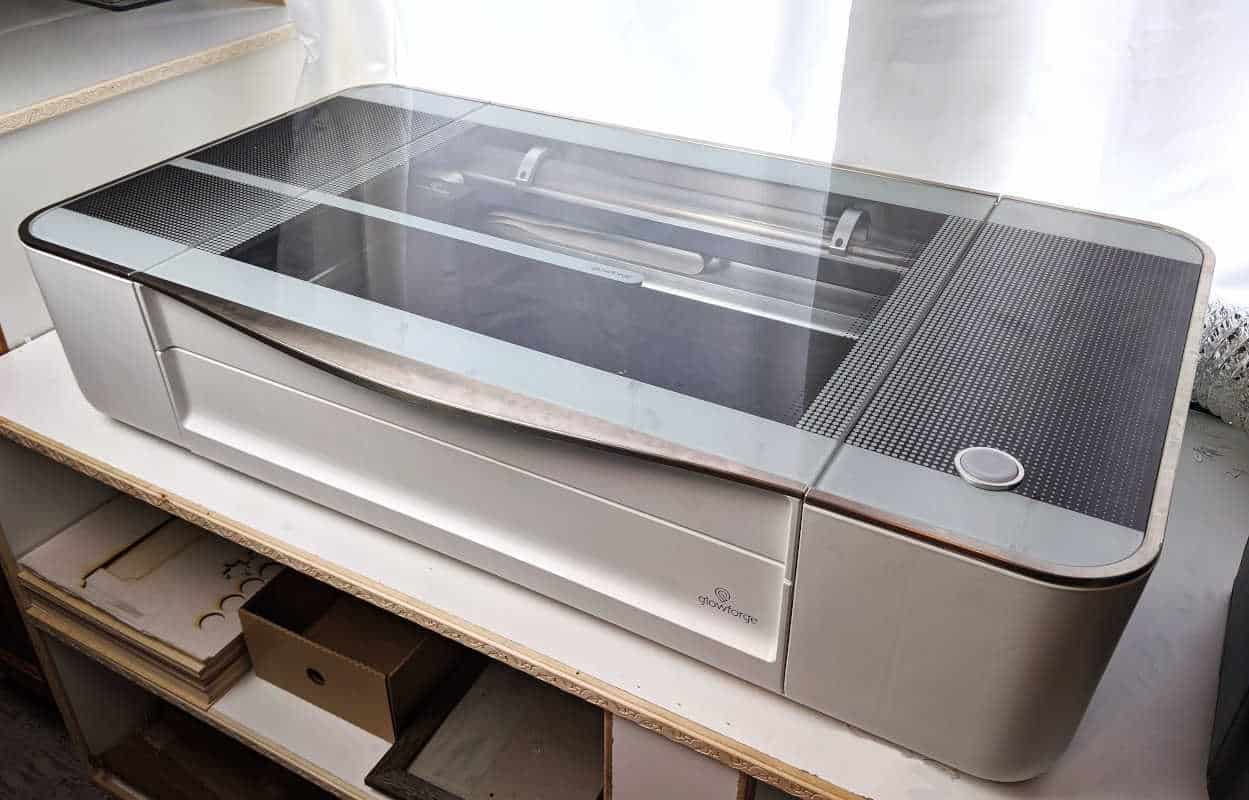
Another thing to consider is placement in your room. The Glowforge is big, measuring 38″ x 20.75″ x 8.25″. If you get a pro model with the passthrough slot, you’ll need to put your Glowforge in place that will let the material come out the back.
A fun thing about when you set up your Glowforge is you get to name it. Be sure to think of a cool name before you
First Projects
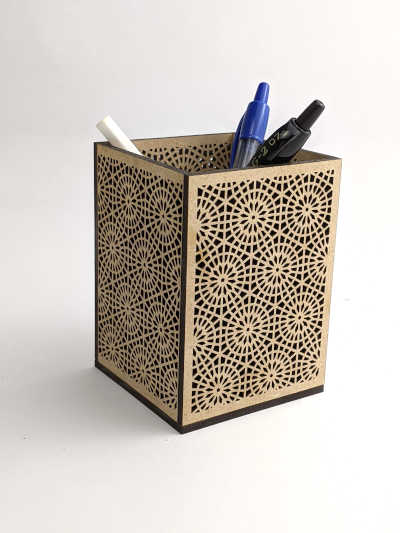
They recommend that your first project is a keychain. I’m the type of person who will jump in before I know how to swim so my first project was a pencil holder from one of their free files.
It was very simple to set up. First, you will need to put the prograde material in your machine. Your Glowforge will autodetect what material it is based on the QR code on the wood or acrylic. It will then use the correct settings for the cut.
The hardest part was waiting for the print to finish because all you had to do was import the design and send it to be cut with the laser beam. Ease of use is one of the big selling points of Glowforge.
If you aren’t using prograde materials, finding the correct cut setting is normally as easy as going to the Glowforge Community page and searching there.
Glowforge Models available-
There are three models available. The Glowforge basic is $3995. The Glowforge Plus is $4995, and the Glowforge Pro is $6995. (As of March 25, 2022) Which is a pretty high price point compared to cheap Chinese lasers. But you get customer service and there is almost no learning curve which can save you a lot of time.
The difference between the basic and the plus is that the plus has a 2x top speed. The plus also has a 12-month warranty over the 6-month warranty of the basic.
The Pro has:
- 3x top speed
- 45 watt laser tube instead of a 40 watt
- 120% cut speed
- Enhanced cooling so you can cut all day without overheating
- Pass through slot so your can cut larger pieces of different materials
If you are running a small business, you might want to get a more expensive model so you can run it longer and cut faster. But you can also get 2 basics for the price of 1 pro. So do the math and figure out which one is the best option for you and your situation.
Proofgrade materials-

Glowforge has its own line of materials you can cut. They have a QR code that the machine reads to know what settings are needed to cut it.
It’s really nice to not have to play around with settings to get the perfect cut.
Occasionally, I have spent 30 minutes trying to get the perfect cut on some materials. (Mostly paper because it can be a little finicky). One way to solve getting cut settings quickly is by visiting the Glowforge community webpage or Google.
Most of the time proofgrade materials will cut without problems but I have had some not cut all the way through the backing. Luckily it’s a very easy fix of slowing down the cut.
All proofgrade materials come with a mask (basically masking tape) on them that prevents stains from the smoke. If you
I have also had times when the machine couldn’t read the QR code on the various materials. To fix the problem, I placed a cutting board over the top glass because the glare from the window made the code impossible to read.
I’d use proofgrade more often but it is more expensive to
Glowforge Web App-
The software for your Glowforge is found on a webpage so you will need an internet connection. I would prefer it was a desktop program so you could use it even when there is no internet. Or even connect it to adobe illustrator which I use to create some of my files.
The nice thing about it being a webpage though is that you can use your Ipad or Chromebook with it.
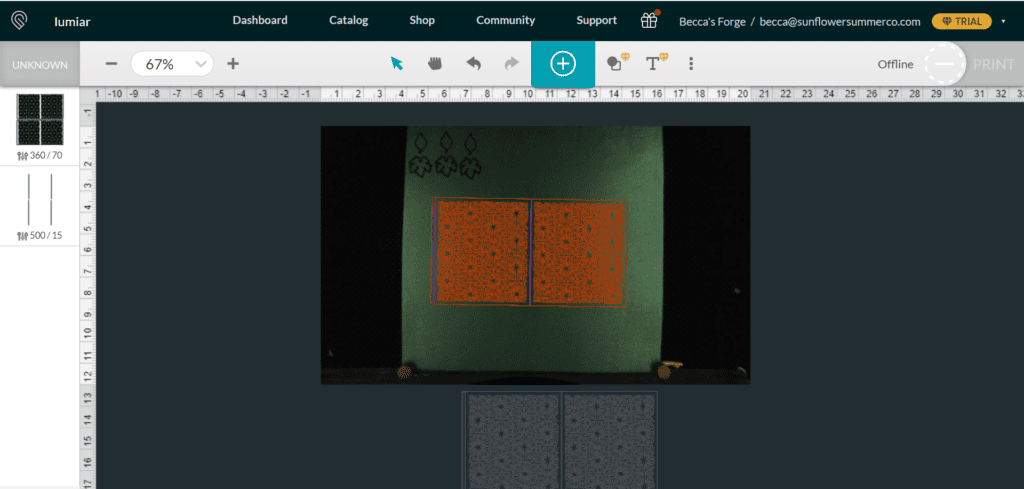
The Glowforge software is also very basic and will show a live camera preview of your cutting bed. It will not give you a real time preview but it will help you place your design in the correct spot on your materials.
You will not be able to design much of anything in the software and you’ll need Illustrator, or Inkscape to design.
Mostly you load up your file to cut, pick your settings and send it to Glowforge to cut. It is really simple and easy to learn.
You can subscribe to Glowforge premium to get extra features. It will let you add basic shapes, text, and clipart from the design catalog.
You will also get the design of the month. Most of them are pretty cool like a 3D rocket ship.
Other features-
- Unlimited design storage
- Tools for editing your designs
- Millions of graphics and fonts
- Your file loads faster onto your Glowforge to print
- Access to your print history so you can restore previous prints if you change them
- Early access to unreleased features
- Ability to share premium features with 2 other family members
You can subscribe monthly or you can get a year’s subscription for a significant discount.
Everything is Connected with Bluetooth
You can’t connect to your Glowforge via a cable. Everything has to be done with Bluetooth. I have not had a problem with it yet.
The more complicated the design, the longer it takes to process and upload the design to cut. For very detailed cuts, it can take up to a minute for it to load onto the Glowforge before you can cut it.
Engraving-
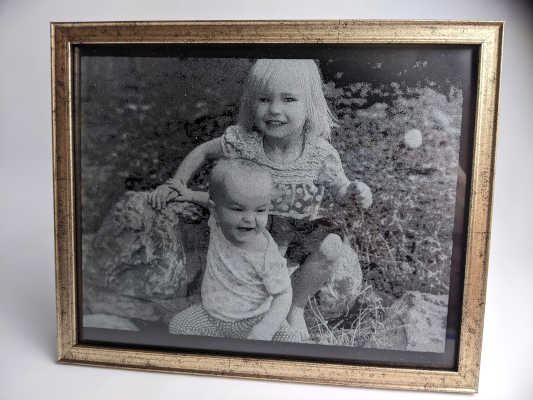
Engraving is super fun to do with your Glowforge. My favorite thing to do is engrave pictures on glass.
The Glowforge is great at engraving pictures and there are so many things you can engrave.
The images that the Glowforge engraves are high quality and very professional.
You will not be disappointed.
Unfortunately, engraving can take a long time. I engraved a picture that is 9″x7″ and it took 1 1/2 hours to engrave.
Customer support-
I looked at getting a cheaper laser but the thing that sold me on a Glowforge was the support.
I’ve only had one problem with my machine and customer support was amazing.
My machine wasn’t cutting straight lines. I posted my question in the Glowforge form and I got answers right away. They told me that the wheels on my print head might be broken. I checked and that was the problem. (I read that they had a bad batch of wheels that broke easily. So you shouldn’t have this problem)
Glowforge support sent the replacement wheels quickly. I only had a week where I couldn’t use my machine.
Projects I have made
My Glowforge has made it super easy for me to create things I never thought I would be able to make.
I created this bird feeder and pinata for my two little girls.
I used cardboard for the pinata and it was wonderful that I didn’t have to cut out the shape of a horse by hand.
I also created these layered mandalas for my craft room wall. It is much cheaper to make wall art than it is to
I also used it to cut the centers of these giant paper sunflowers from chipboard.
I have also used it to cut and engrave thank you cards. I love how the paper looks when it is engraved.
I have also created these leaf earrings from wood.

Glowforge Community
There is a form that you can join to ask questions and the people are always very helpful. There are lots of cut settings and project ideas you can find on the form too.
The Glowforge community is super helpful. It is very active and if you have a question, you are sure to get answers quickly. Click here to get up to $500 off your Glowforge
Files Types that are Supported-
Glowforge is compatible with JPG, PNG, SVG, PDF, and other file formats.
Some files are able to be cut and others can only be engraved.
SVG can be cut and engraved.
JPG, PNG, PDF can only be engraved.
Scan and print-
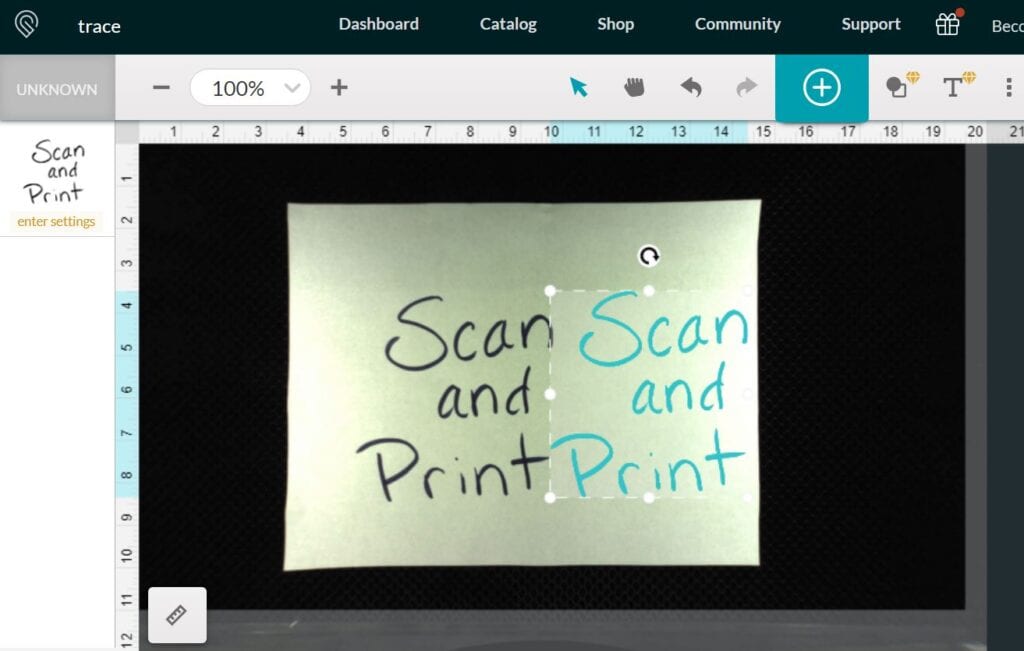 The black is what I wrote and the blue is the trace the Glowforge made using the trace feature.
You have the option to scan something that you draw and cut or engrave it. This is a pretty cool feature but I don’t find myself using it much.
I am not a great artist and I would rather design something in illustrator. Though I might need to play around with it more.
It was fun to use when my daughter drew a stick figure. I then used my Glowforge to create a whole army of stick figures. My daughters got a kick out of it.
To get the best cut, use a dark color on a light background. Also, cover the top of the Glowforge with something to block out the light. Having shadows on your design can make it so it doesn’t trace well.
Cutting bed
A Glowforge cutting bed is 20×11 inches big. Sometimes I wish it was bigger but if it was, they would have to make a massive machine.
If you get the Pro model, you can cut something as long as you want. It just has to be 1/4″ thick or less to fit through the pass-through slot. So basically you can cut something 20 inches by 100 feet if you really wanted to.
Auto Focus
A nice feature they added was autofocus. If you have a warped board, it might measure .125 inches thick but it sits .2 inches above the bed because of the warping.
You are able to tell the Glowforge to focus on a certain spot allowing the machine to know exactly how high to focus the laser.
This can be very helpful especially if you don’t have digital calipers.
Things I don’t like-
I love my Glowforge but some things do annoy me.
The biggest is how long it takes to warm up. As soon as you turn on the machine, it needs to center the cutting head. This can take anywhere from 30 seconds to over a minute. My Silhouette cutting machine takes 5 seconds and it is ready. So don’t turn your Glowforge off if you are going to be using it again soon.
The next biggest thing I don’t like is that I had to recalibrate my camera. When I first got my Glowforge, it was off by 1/4 from where I put it on the computer. Now it is almost spot on. It was a simple fix for recalibrating the camera. Learn how to recalibrate your camera.
Cutting height is something that annoys me. There is a crumb tray that sits in your Glowforge. If you are cutting something very thin like paper or cardboard, you leave it in. If you are cutting something thicker you take it out.
You can cut anything up to .5″ with the crumb tray in and anything 1.5″ and 2″ thick without it. There is a gap in the middle so if you are trying to engrave something that is .75″ inches thick, you will need to place something under it to get it to 1.5″ high or else the Glowforge can’t focus on it.
This was a problem for me when I was trying to engrave the cover of a journal. It was too thick to engrave with the crumb tray in but too thin to engrave without placing something below it. It took me 10 minutes trying to figure out why it wouldn’t engrave and then another 5 minutes trying to find something the right height to put under the journal.
Things I do like
There is so much that I love about my Glowforge.
I really love that I am able to cut intricate pieces with very little effort on my part. And if you have a project with more than one piece, the pieces always fit together perfectly.
There are so many things that you can make with the machine. Getting the settings right for cutting isn’t hard and there are many things you can cut or engrave.
The community is super helpful and it’s really nice to know they are a post away if you need any help.
My Glowforge is very easy and fun to use!
Extra tools you will need-
Having your own laser is super cool and fun but you will need some tools to get the most out of it.
First I would recommend a good pair of digital calipers. You need to measure how thick the material you’re cutting is. I didn’t think this was such a big deal but I forgot to set the focus height when I was cutting paper the cut was much wider than it should be.
You will also need some masking. Cutting with a laser can produce a lot of smoke. That smoke can stain whatever you are cutting. So be sure to invest in some good tape.
Scraping tool– it will make sure that your masking is stuck down and that smoke will not get under it.
Magnets– if you are cutting paper, magnets are a great way to keep your paper in place. The Glowforge uses strong fans to blow all the smoke away and it can blow whatever you are cutting too.
Glowforge Review Summery
I love my Glowforge and it is super fun to play with. My kids love pressing the big blue button to cut out the design. They fight over it half the time (I should probably add that to things I don’t like)
If you decide to get one, you will get many compliments on the things you make. They’ll look much more professional than something you can cut by hand.
Glowforge is a high-tech laser cutter that can cut anything from paper to wood, plastics, and more. It’s easy enough for kids to use but powerful enough for professionals. If you’re considering getting one of these cool gadgets, I hope this article helped you decide if it’s right for your business or hobby needs.
You can get $100 off the basic, $250 off the plus, and $500 off the pro just by shopping with this link.
If you get a Glowforge, you won’t regret it!