
This post contains affiliate links. That means I may earn a small comision if you click on a link and purchase something. This cost you nothing. Read all the legal boring stuff here..
So you want to paint a terracotta pot?
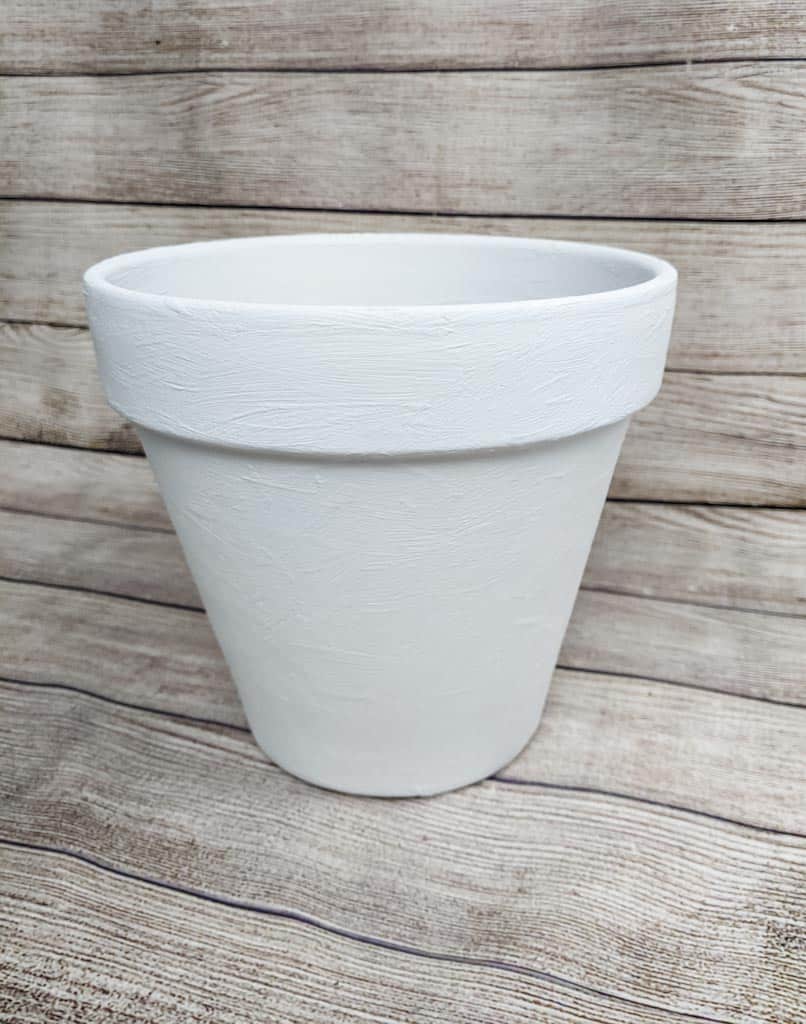
It’s actually not that difficult. All it takes is some baking powder, chalk paint, and a little patience. This DIY project will make your pots look like textured ceramic and it will make your plants very happy.
Add these pots to your garden and you’ll be the envy of your friends and neighbors. If you’re like me, you have a bunch of patio pots that are desperately in need of some attention. I’ve been wanting to change them out for a while but pots are expensive! The solution? Painting them myself.
This DIY terracotta pot project is an easy way to do just that.
You will need:
- Baking Powder <-
- Chalk paint (I used chalk paint from Wal-Mart)
- drop cloth (a cheap plastic table cloth is ideal)
-Kylon Fusion Clear Sealer (make sure it is for outdoor use and a flat finish)
Step 1:
First of all, wash the terracotta pot in warm soapy water to remove any dust or grit and allow it to dry thoroughly (this part is very important as you don’t want moisture trapped between the pot and the paint)
Step 2:
Apply the clay pot sealer to the pot and allow it to dry for 24 hours.
Step 3:
Mix the paint and baking powder together in a bowl I used 1/2 cup baking powder and 1 cup paint. You want to be able to dip a paintbrush in and out without it dripping off too much, but not too thick that it won’t cover the pot.
The paint will start to puff up, this is normal. If you use baking soda, the paint won’t puff up. I tried both and baking powder gave a better finish.
Step 4:
Dip your paintbrush into the mix and start applying it all over the pot. You do not need to use a lot of paint, just enough to cover the areas you want.
When applying it you will notice that the layer isn’t smooth or even, this is what you want! Allow drying time between layers by about 1 hour for light coats and 2 hours for heavier coats.
Step 5:
Once dried, apply another coat of paint and repeat step 4 until you have achieved your desired effect. Remember to allow drying time between layers.
Step 6:
Apply a final coat of clear sealer on top of the terracotta pot and leave it to dry. You do not need to wait until the next day. If you want a long-lasting finish allow the sealer to fully cure for at least 24 hours before placing it in direct sunlight or water.
Once your terracotta pot is dry, it’s ready for your plant!
You don’t have to be a pro artist or spend hours on your project. It is easy, affordable and you can do it at home by yourself with no experience required!
If you are looking for an inexpensive way to give your room some pizzazz without having to spend money on expensive new furniture, this could be the perfect solution. Painting terracotta pots is not only a great DIY craft idea but also gives your space that personal touch we all need from time to time.
So what are you waiting for? Grab those paintbrushes and start getting creative today!